
With over a billion active users, Facebook is the absolute leader in social networking. Your potential clients spend a lot of time on Facebook, so displaying your Google Street View virtual tour is just one way to stand out from the competition, attract the attention of visitors to your fan page, and increase their interaction with your brand.
Virtual tours are located on Google servers, which means you don't have to worry about hosting or additional costs. After you take photos of your space and the virtual tour is published, it's time to show it to your users.
In addition to being able to find your virtual tour on Google, you can also post it on your website and on Facebook.
Simply follow these 5 steps to post your Google Street View virtual tour on your Facebook fan page in just a few short steps:
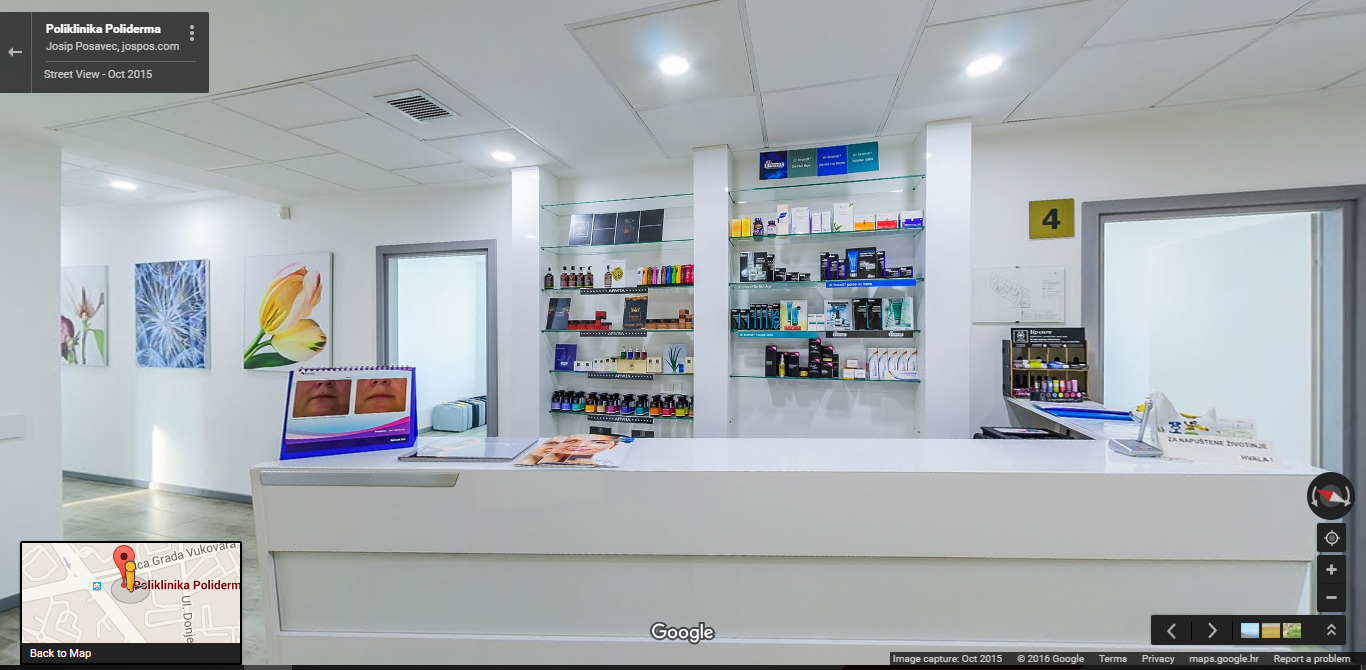
- First, you need to log in to the Gmail account that contains your Google+ business page. If you don't log in through that email address, you won't be able to open additional settings on the virtual tour. So, once you're logged in, open a new window in your browser and find your virtual tour on Google Plus, Google Maps, or the search engine. Click on it to expand the tour to the full screen, and it should look like the image below. In your virtual tour, find the view from which you would like your virtual tour to start. Choose any angle or position.
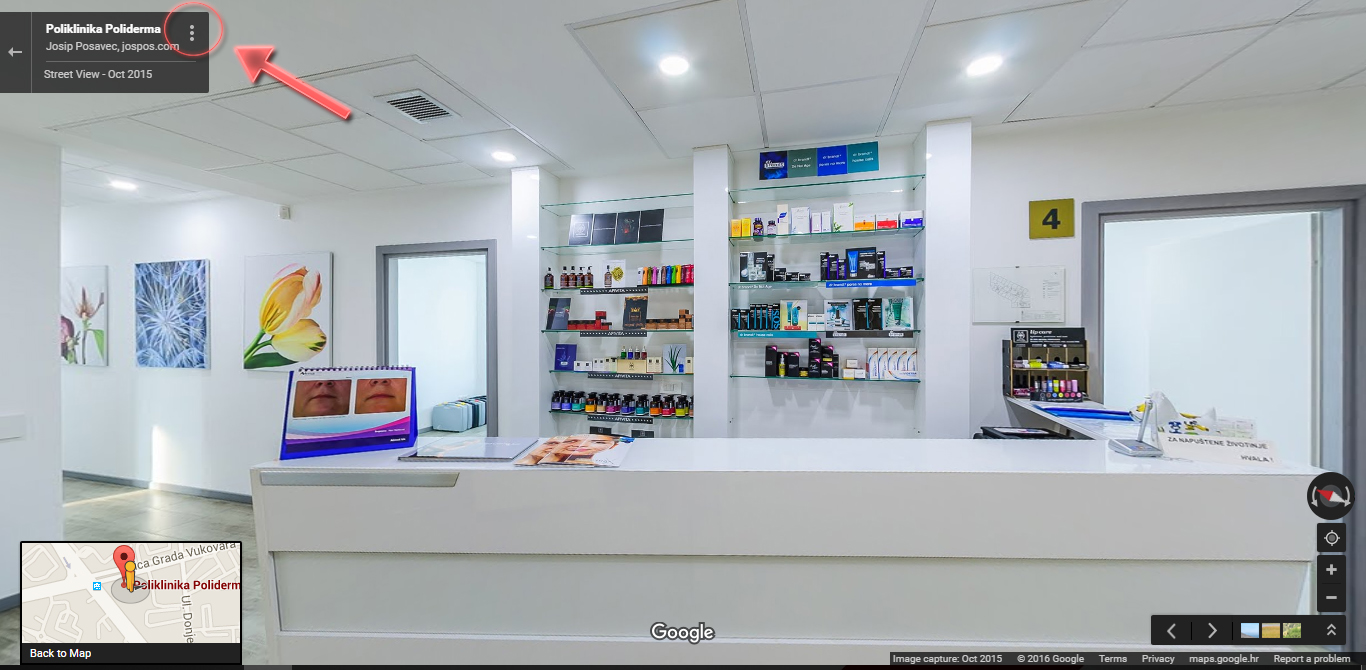
- Once you've chosen the angle and position from which your virtual tour should start, click on the three dots in the upper left corner, then "Share or embed image".
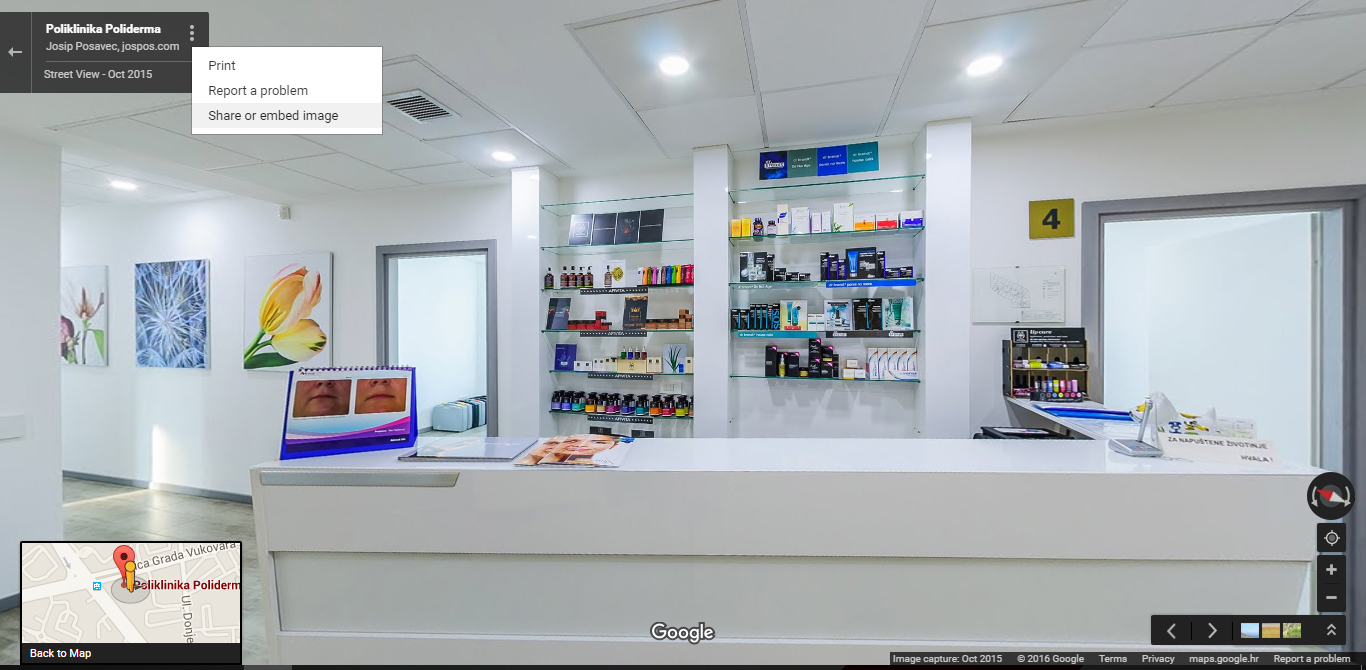
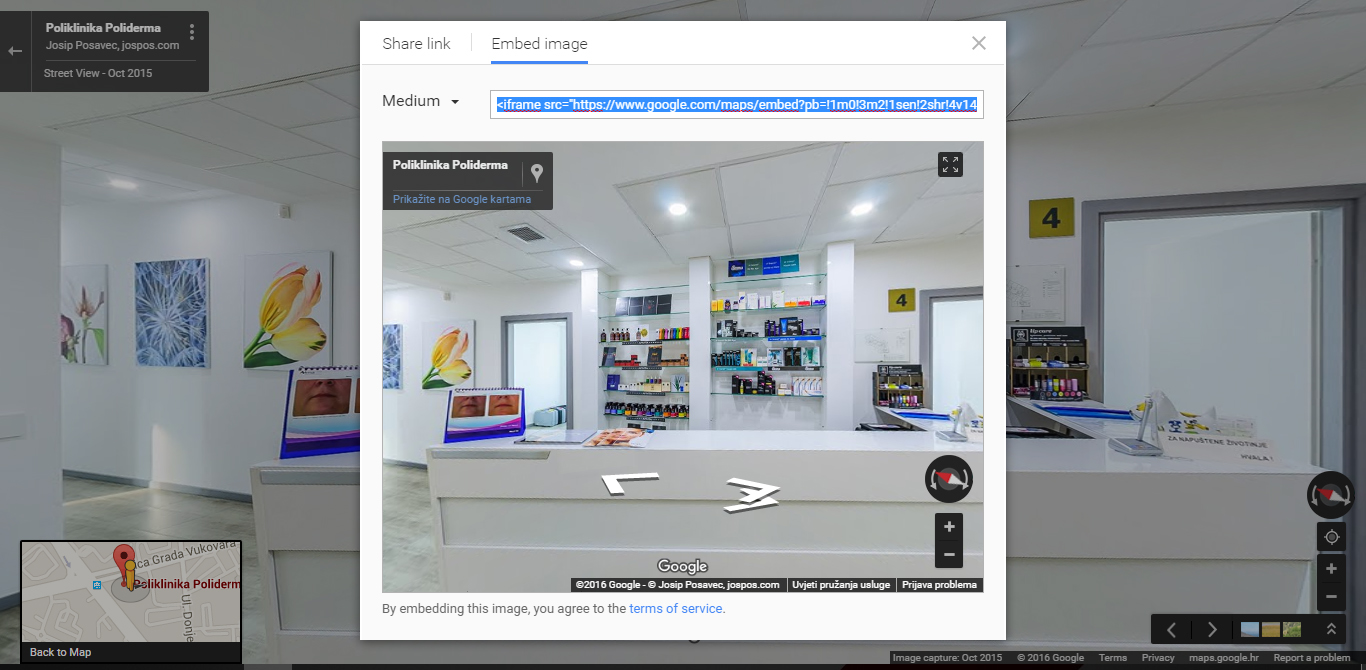
- In the open window, select "Embed image". Make sure "Medium" is selected for the size of the tour, then mark the code and copy it.
-
IMPORTANT! To install a new window for your virtual tour, you need to be logged in through your personal profile to start the entire process. Make sure you have switched to your personal profile before continuing.
Log in to Facebook, then come back here and follow this link to install the Woobox custom page tab app. Choose your business Facebook page and then click Install Page Tab.
-
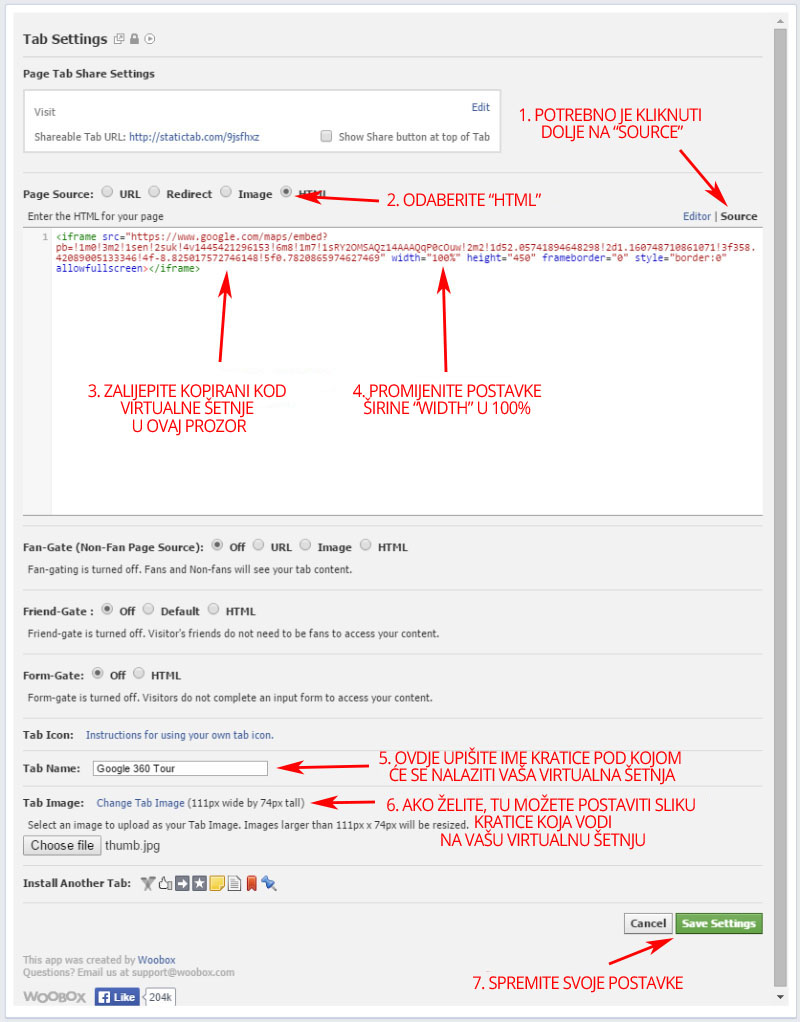
After installation, it will take you to the page settings and you should see a window similar to the one shown below. Choose the options shown below and paste the code you copied for your virtual tour. After you've compared your settings to the settings in the picture, click "Save Settings" at the bottom of the page to save the shortcut for the virtual tour on your Facebook page.
And finally...
Visit your Facebook page to preview your virtual tour. You can find the virtual tour tab under your cover photo. If it's not there, click on the "More" option.
There you have it, your Google Street View is now added to your Facebook page. Now, publish it and invite users to take a virtual step into your space.
Better impression
Questions? Contact us
We take your privacy seriously. Your email address will not be abused
